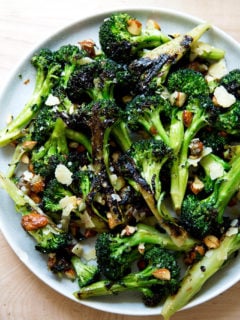
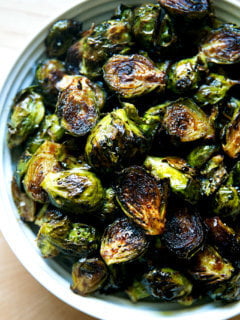
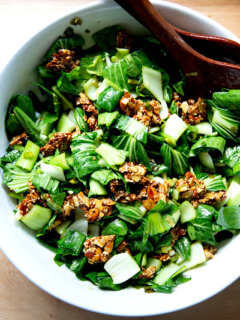
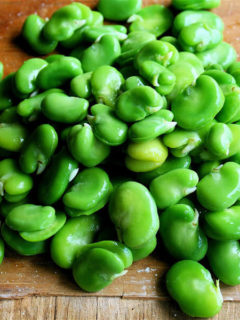
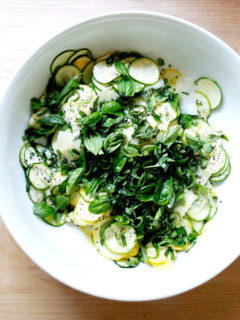
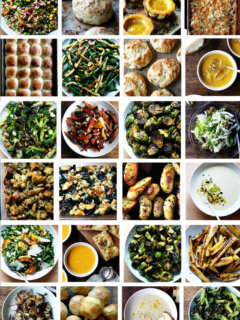
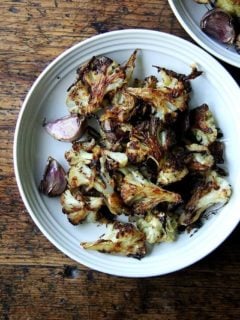
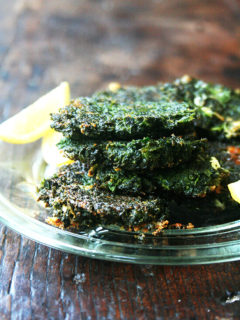
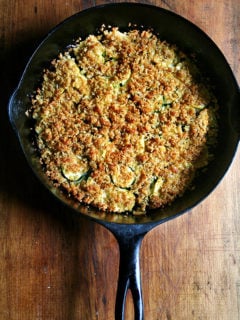
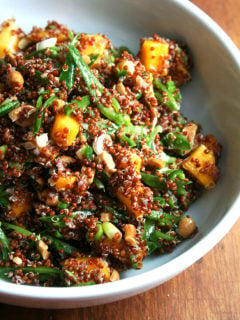
A few weeks ago I discovered that for all the years I have been cooking quinoa I have been doing it wrong. The quinoa I have made, as a result, while edible and receptive to countless seasonings and additions, has never kept my attention for very long — after the odd week-long-quinoa binge, I’d forget about it for months.
But after posting the radish entry a few weeks ago, I received a comment from a dear old friend who managed several of the Philadelphia farmers’ markets while I lived there. Joanna pointed me to a Yotam Ottolenghi recipe for a quinoa salad with radishes, fava beans, avocado and a lemon vinaigrette she had recently made for some friends to rave reviews.
A quick google search led me to the recipe. While the ingredient list had me foaming at the mouth, it was the first few lines of the instructions that really struck me: Place the quinoa in a saucepan filled with plenty of boiling water and simmer for 9 minutes. Drain in a fine sieve, rinse under cold water and leave to dry.
PLENTY of boiling water. Simmer for NINE minutes. RINSE under cold water. Is this news to you, too? Why has every package of quinoa instructed me to cook it as if it were rice — 1 part grain to 2 parts water — in a covered pot? And to cook it for at least 15 minutes but often for as long as 20? And after the cooking process, to let it rest off the heat under its steaming lid for an additional 5 to 10 minutes?
On Wednesday we welcomed spring, the arrival of a new season’s CSA, and the first of many many many many many radishes. Can you sense my enthusiasm?
Look, I love radishes — honest, I do — and I don’t want to sound ungrateful, but I do have mixed feelings about the quantity I consume as a CSA subscriber. I’ve mentioned this before, so I won’t dwell, but I just find it challenging to work radishes into meals in substantial ways, in ways that make me feel I am getting more than just a yummy snack. Yes, I love eating radishes on buttered bread or simply halved and dipped in salt. Served with some canned fish and a few cheeses, I can call these preparations dinner and feel the radishes have played a significant role in the meal.
But wouldn’t it be nice if radishes could pull a little more weight at the dinner hour? As I was unloading my CSA last week, I remembered a salad — an edamame and radish salad — we used to make at Fork for Fork:etc, (the prepared food, sandwich, salad, on-the-go part of the restaurant). During the lunch hour, this salad flew out of the case. High in protein, light, colorful, satisfying — what’s not to love?
Tired of cooking? Me too. But I have one more teensy tiny recipe to share with you before I disappear into I-don’t-feel-like-cooking-anything mode. And it’s a good one. You HAVE to make this. Not immediately, but soon and definitely before the end of the year, because nothing will look more festive on your holiday table and nothing will taste more restorative in the season of endless feasting.
The recipe comes from the book Turquoise by Greg and Lucy Malouf, which my aunt introduced to the family last winter when she served this stunning salad at a dinner party. The myriad textures and sweet-salty-hot dressing make this salad irresistible. Read More
I’ve been trying to do a test run of Suzanne Goin’s stuffing with slow-cooked kale, but I can’t get beyond the cooking of the slow-cooked kale step. I’ve tried twice, but the kale keeps disappearing, and as a result, my loaves of country bread and bulbs of fennel continue to be neglected.
Cooking kale in this manner is new for me. For one, like many people, I have taken to eating it raw not only because it tastes good but also because one raw bunch can be stretched over more meals than one cooked bunch. Second, if I do sauté it, I do it very quickly over high heat with a little olive oil, garlic and crushed red pepper flakes. I’m not sure I’ll ever do that again.
In Goin’s method, the kale is blanched first, Read More
There was a time in my life when subscribing to a CSA had little appeal. I wanted to buy what I wanted to buy when I wanted to buy it. Today, I am happy to have somebody else make the decision for me.
In the past six years, subscriptions to CSAs in eastern Pennsylvania, southern California and northern Virginia have forever transformed how I eat and cook. I have learned to plan meals based on the vegetables I have at hand not the protein. I have learned to appreciate vegetables in their freshest state seasoned with little more than olive oil, salt and pepper. I have eaten more dark leafy greens than I ever imagined.
During this time, too, I have allowed more than one bunch of radishes to shrivel up and rot, a kohlrabi bulb or two to desiccate, and a few bags of okra to mold over. It is painful — shameful — to see these foods spoil. Today, not a morsel of my CSA goes to waste.
Below, I have compiled some things I have learned these past six years that help me utilize my CSA to its fullest potential. Read More
Most of you know that Julia Child would have celebrated her 100th birthday this August 15th. For months, chefs, restaurants, bloggers and many others across the country have been paying tribute to her life and legacy. I joined in on the fun over at PBS, adding a tribute inspired by a favorite Julia Child quote: No matter what happens in the kitchen, never apologize.
In recent weeks, I have found myself consumed by all things Julia. I’ve been referencing Julia’s Kitchen Wisdom more than ever, watching The French Chef (via Amazon and Roku) every night after dinner, and reading My Life in France before bed. All of the celebrations these past few months have inspired the creation of the above- and below-pictured notecards, too, featuring classic Julia Child quotes, ones that never fail to make me chuckle, and I hope you, too.
The cards are printed on luxe (190 gsm), natural white eco paper, and if you would like to order a set, they are available for purchase here. Of course I’d like to give a couple of boxes away, too. Just leave a comment if you’re interested.
And now for a recipe, a non-Julia-Child-inspired-but-delicious-none-the-less recipe. Since discovering semi-pearled farro several months ago, it, in some sort of salad variation, has become a weekly staple. This is the latest, a combination of roasted corn, fresh-squeezed lime juice, cilantro, minced chili peppers and diced peppers and onions. If you strategize by chopping the vegetables and herbs while the corn is roasting and the farro is simmering, this salad can come together in just about 20 minutes. It yields a lot, thanks to all of the add-ins, and tastes better with each passing day.
Farro Salad with Roasted Corn, Red Pepper & Red Onion
Serves 6 to 8 as a side dish
2 ears of corn, kernels removed
olive oil
kosher salt
fresh cracked pepper to taste
2 red peppers, diced
1 red onion, diced
1 cup of semi-pearled farro*
cilantro, a lot (or as much as you like)
1 hot chili pepper, such as Thai bird or jalapeno, minced
fresh-squeezed lime juice or white balsamic vinegar (I used a combination — about 1 tablespoon lime juice and 1 tablespoon white balsamic vinegar)
Tabasco (optional)
*Roland semi-pearled farro is particularly nice but any type of farro or grain — wheat berry, barley, etc. — will work nicely. You might be able to find semi-pearled farro at your local supermarket, but if not, you can order it here. Of course, whole farro will work just as well.
1. Preheat the oven to 450ºF. Place a pot of water on to boil. Toss corn kernels with olive oil and salt and pepper to taste on a sheet pan. Place in the oven. Roast for about 12 to 15 minutes or until the corn is just beginning to char.
2. Meanwhile, add farro to pot of boiling water. Add a big pinch of kosher salt. Cook for about 15 minutes — taste a few kernels after 15 minutes. For me it takes just a minute more than 15.
3. Drain the farro, and add to a large bowl. Season with a big pinch of kosher salt. Drizzle olive oil over the farro while it’s still warm. I haven’t been measuring, but if you’re looking for some guidance, start with about 3 tablespoons of olive oil. Squeeze lime juice and/or white balsamic over top — again, you don’t have to measure, but if you like to, start with about 1 tablespoon each of lime juice and vinegar (or two tablespoons of either lime juice or vinegar) and adjust after everything has all been mixed together.
4. Add the roasted corn, diced red pepper, red onion, cilantro and chili pepper to the bowl. Toss with a large spoon. Taste. If it’s a little dry, add more oil and/or lime juice and white balsamic. If it needs a little more seasoning, add more salt. I add about 10 large dashes of Tabasco for taste more than for heat — the chili pepper adds enough heat — but this seasoning is optional.
Lemon sugar revolutionized baking for me. Lemon salt promises to do the same for everything else. Though my use of this flavored salt extends to this single recipe — “straw potatoes” seasoned with lemon salt (thanks to April Bloomfield) and fried with rosemary (thanks to Jamie Oliver) — the possibilities are endless. Salt might just become lemon salt from here on out.
I know deep frying can be intimidating — vats of hot oil are never fun — and somewhat wasteful — even small-batch frying requires a fair amount of oil — and smelly — your kitchen (house?) inevitably will smell of fast-food — but sometimes these sorts of annoyances are worth the trouble. This is one such case. You won’t be disappointed. I promise.
A few notes:
• This recipe requires a mandoline — the fine shape of the julienned potato allows them to fry up first time around (as opposed to thick-cut fries, which require a double fry) — and calls for deep frying.
• When deep frying, be very careful. Use a pot with high sides to be safe, and make sure the oil is not filled as far as half-way up the sides — two or three inches should do.
• Fry in small batches: If you add too many potatoes to the hot oil, the oil will bubble over the side of the pan and creep along your stove top, creating a huge mess and posing a serious danger to you and anyone crawling around your floor. Too many potatoes at one time, too, will bring the temperature of the oil down, which will cause the potatoes to take longer to cook also making them soggy in the process.
April Bloomfield’s Rosemary Straw Potatoes with Lemon Salt
Source: Cooking with Jamie
for the lemon salt:
zest of one lemon
4 tablespoons sea salt (I used 3)
sunflower oil (I used a mix of canola and vegetable oil)
1 3/4 lb. potatoes, peeled and julienned* (I used Yukon Gold, and I didn’t peel)
a few sprigs of rosemary
* The potatoes can be julienned in advance — about an hour or so — before they start turning slightly brown. A little brown is OK, but too much brown is probably not a good idea. Storing the potatoes in water will prevent browning, but you also must dry the potatoes very well before you start frying, which is kind of a pain.
1. Make the lemon salt: In a mortar and pestle, bash together the lemon zest and salt until salt is flavored, colored, and fine. Place in a dish. Use whatever you need right away or allow it to dry out for a couple of hours before storing it. (I made my lemon salt a day in advance and stored it in the mortar wrapped in plastic wrap.)
2. Heat 2 to 3 inches of oil in a sturdy, high-sided pan; bring to deep-frying temperature (350°F; to avoid oil catching fire, be sure to maintain its temperature at 350°F). Jamie’s tip: place a potato in the cold oil before you turn the burner on. When the potato rises to the top of the oil and begins to turn golden brown, the oil is ready. Remove the potato piece and start frying in small batches.
3. Pat the julienne strips dry with some paper towels to remove any excess starch. Making sure you’ve got a slotted spoon or spider (which is like a flat colander with a handle) and a big pile of paper towels to one side (I did not use paper towels, but instead transfered the finished fries to a large aluminum bowl, which allows for easy tossing), carefully place some of your potatoes into the pan of oil (don’t overcrowd it) for a couple of minutes (1 to 2) until golden brown and crisp. Cook potatoes in batches until they are all used up. Add the rosemary for the last 30 seconds. (Note: It’s hard to judge when the last 30 seconds will be, but the rosemary can be in the oil for as few as 10 seconds. I basically added the rosemary in at the last few seconds of each batch). Remove the potatoes and rosemary to the paper towels (or a large bowl) to soak up any excess oil; dust with your lemon salt. Serve immediately, perhaps alongside a blue cheese burger as they are at the Spotted Pig.
Shortly after posting the summer squash spaghetti entry, I received a message on Facebook from a reader. It said: “I just ordered the mandoline! My husband is shaking his head. Just wait!” Shortly after reading the comment, a few images flashed through my head: a dismembered finger, an angry husband, and a couple sitting in the ER waiting room cursing my name. What had I done?! Statements and suggestions from that post had to be followed up, sooner rather than later.
Let’s start from the beginning. In that post, I noted that I prefered my Benriner mandoline to my Benriner turning slicer for the long thin wisps it creates. This is true. The Benriner mandoline is great for, among many reasons, creating julienned summer squash and cucumbers, for slicing potatoes into rounds to be baked or fried into chips, and for thinly slicing radishes and kohlrabi for salads. Moreover, it, unlike some mandolines, can be adjusted so that it truly makes paper-thin slices (others stop at 1/4-inch or 1/8-inch).
What I perhaps love most about the Benriner mandoline, however, is its size, which measures only 13.5 x 6 x 1-inch, making it compact enough to fit right against the inside wall of any of my kitchen cupboards, allowing for easy access and stowage. Having never owned any other mandoline, I have only my mother’s to compare, which sits in the same cumbersome box in which it was packaged and lives someplace in her basement. It’s no wonder she never uses it.
The Benriner mandoline is not perfect, however, and if you decide to get one, it is important to keep a few things in mind:
1. Because it is handheld, it is necessary to have some way of securing its bottom edge while you are using it. I have a wooden cutting board with a back raised ledge (see videos below), which works perfectly, but a wall (if your counters aren’t too deep) or a brick (maybe?) could serve the same purpose.
2. Because it does not have one of those protective plastic shields — or if it came with one, I have no idea where it is — it has the potential to seriously injure whoever is operating it. With this is mind, reader Dee G left a great comment on the pasta post: “Love my mandoline, and I use it with no fear after purchasing kevlar gloves from Amazon. I could never make the pushing thing work for me and always used my fingers…a dangerous proposition. Those gloves are simply fantastic! And you really only need one, so buy a pair and share with a friend. I promise you’ll use that mandoline much more often!”
Dee G was right. The gloves give you all the confidence you need to pass any vegetable swiftly down the mandoline plane right through the razor sharp blade. I purchased these kevlar gloves and would like to share one half of my pair with one of you. Leave a comment if you are interested.
3. Finally, Kevlar glove on or off, the Benriner mandoline is not the best tool for certain jobs. Julienning potatoes, for instance, I found to be very challenging with the Benriner mandoline. In contrast, the turning slicer seemed to magically and effortlessly multiply my single potato into a beautiful web of thinly sliced strands, the perfect shape for frites (or a frites nest I should say).
In sum, if you’re in the market for a mandoline, I highly recommend the Benriner, but I would sleep better knowing you purchased a pair of kevlar gloves along with it. And if you have room for another gadget, the Benriner turning slicer (I’ve discovered this past week) does in fact have a place in the kitchen — for certain vegetables it is a much safer and better tool to use than a mandoline, and if you’re at all frightened by the idea of using a mandoline, the turning slicer might be the way to go.
This salad is so summery and refreshing, perfect aside grilled meat or fish.
One note: I used a cucumber that I had sliced on the turning slicer for this salad. It was beautiful but a little bit awkward to serve — the turning slicer creates insanely long strands of whatever it is slicing up. One way to avoid this situation is to either use a mandoline or a knife (neither a turning slicer or mandoline is necessary to cut up cucumbers — just slice the cucumber into thin rounds or small dice) or to chop up the cucumber “nest” created by the turning slicer before tossing it with the feta, mint and dressing.
Cucumber, Feta and Mint Salad
Serves: However many you like
cucumbers, julienned or diced or sliced into rounds
feta cheese
mint, thinly sliced
extra-virgin olive oil
white balsamic vinegar
1. Combine cucumbers, feta and mint in a bowl. Toss with equal parts olive oil and white balsamic. As a reference, I used 1 tablespoon of olive oil and one tablespoon of vinegar for the 1 cucumber I sliced up. Season with salt if necessary — I found that the feta added enough saltiness so I didn’t add any additional salt.
Toasted pine nuts, Zante currants, a handful of mustard greens — smells awfully familiar, doesn’t it? That’s likely because it’s the exact makeup of the Zuni Cafe bread salad minus the bread. If it doesn’t ring a bell, I recommend familiarizing yourself with this most adored salad first, then making your way back here where a springy variation awaits, a farro-for-bread substitution making it a touch lighter but no less delicious.
I can hear your grumbles. Without the bread (literally) and butter of the Zuni salad, flavor, you suspect, must be compromised? You’ll just have to take a leap of faith and trust that farro, surrounded by all the elements of the Zuni salad — sweet onions, crunchy nuts, spicy greens, a simple olive oil and vinegar dressing — soaks up the goodness nearly as well as bread all the while maintaining its chewy texture and nutty flavor.
And if you can get your hands on some semi-pearled farro, which cooks in 15 minutes, you’ll find yourself eating more grains than you ever imagined. At least that’s what happened to me. Since discovering semi-pearled farro just over a week ago, I’ve made this salad or some sort of variation of it four times and have consumed (with the help of my husband) nearly 2 pounds of farro.
While semi-pearled farro is not quite as nutritious as whole farro — pearling strips off part of the germ and bran — it’s still a healthy starch (high in fiber and protein) and a welcome addition to my kitchen pantry. I don’t know why the lengthy cooking time of many whole grains deters me from making them, but it does, and as a result, I don’t eat them as much as I would like. I love the idea of making grains in their whole state a staple in my diet. I hope the semi-pearled varieties are paving the way for that transition.
After several days in a row of the Zuni-inspired farro salad, I changed it up a bit and roasted some carrots alongside the onion and substituted chopped toasted hazelnuts for the pine nuts, which made for a nice variation. Just know that this salad is infinitely adaptable — currants are nice but other dried fruits will offer the same texture and flavors; nothing is tastier (to me) than pine nuts but any nut will provide that crunch; and greens provide color, a little roughage and a wonderful spiciness but are not critical.
Mix it up. I hope you find it as addictive as I do.
We received an incredible “Asian mix” of greens in our CSA this week. Mustard greens were included and the whole combo was incredibly tasty.
This is really nice farro. It’s semi-pearled, which means a portion of the outer bran has been removed, which cuts the cooking time way down — it cooks in about 15 minutes. You might be able to find some at your local supermarket, but if not, you can order it here.
Farro Salad with Roasted Onion, Toasted Pine Nuts, Currants & Greens
Serves 2
1 red onion, diced
olive oil
kosher salt
1 cup of semi-pearled farro*
2 tablespoons dried currants — I use Zante currants
white balsamic vinegar
2 tablespoons (or more) pine nuts or any nut you like
a handful or more of mustard greens (about 2 loosely packed cups) — If you can’t find mustard greens, arugula or spinach or any green that can stand up to some heat without completely wilting will do. Add as many greens as you want as well — I tend to go overboard on the greens
*Roland semi-pearled farro is particularly nice but any type of farro or grain — wheat berry, barley, etc. — will work nicely. You might be able to find semi-pearled farro at your local supermarket, but if not, you can order it here Of course, whole farro will work just as well.
1. Preheat the oven to 450ºF. Place a pot of water on to boil. Toss diced onion with olive oil (about a tablespoon) on a sheet pan and season with salt. Place in the oven. Roast for about 12 to 15 minutes or until the onion is just beginning to char — you don’t want the pieces to get too charred (or maybe you do… I kind of love them a little charred.)
2. Meanwhile, add farro to pot of boiling water. Add a big pinch of kosher salt. Cook for about 15 minutes — taste a few kernels after 15 minutes. For me it takes just a minute more than 15.
3. Place currants in a small bowl. Moisten with 1 tablespoon boiling water and 1 tablespoon white balsamic vinegar. Set aside. Toast pine nuts in a small dry skillet over medium heat until golden brown — watch them carefully! Set aside.
4. Place the greens in a large mixing bowl. When the onions are finished cooking, scrape them off of the pan into the bowl over the greens. Drain the farro, and add to bowl. Season with a big pinch of kosher salt. Drizzle olive oil over the farro while it’s still warm. I haven’t been measuring, but if you’re looking for some guidance, start with about 2 tablespoons of olive oil. Splash white balsamic over top — again, you don’t have to measure, but if you like to, start with about 1 tablespoon and adjust after everything has all been mixed together.
5. Drain the currants and add to the bowl. Add the pine nuts to the bowl and toss to coat. Taste. If it’s a little dry, add more oil and white balsamic. If it needs a little more seasoning, add a pinch more salt. I didn’t add pepper, but by all means, add some.