
My Mother’s Peasant Bread: The Best Easiest Bread You Will Ever Make
This post may contain affiliate links. Please read my disclosure policy.
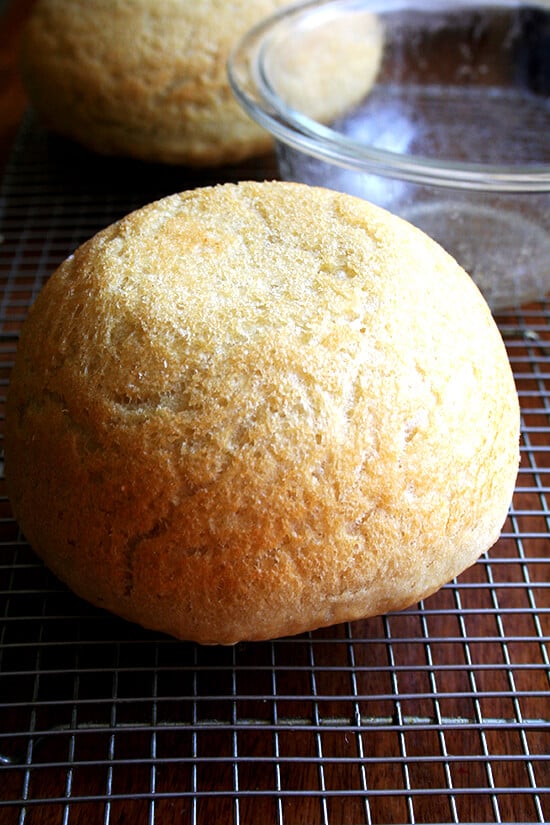
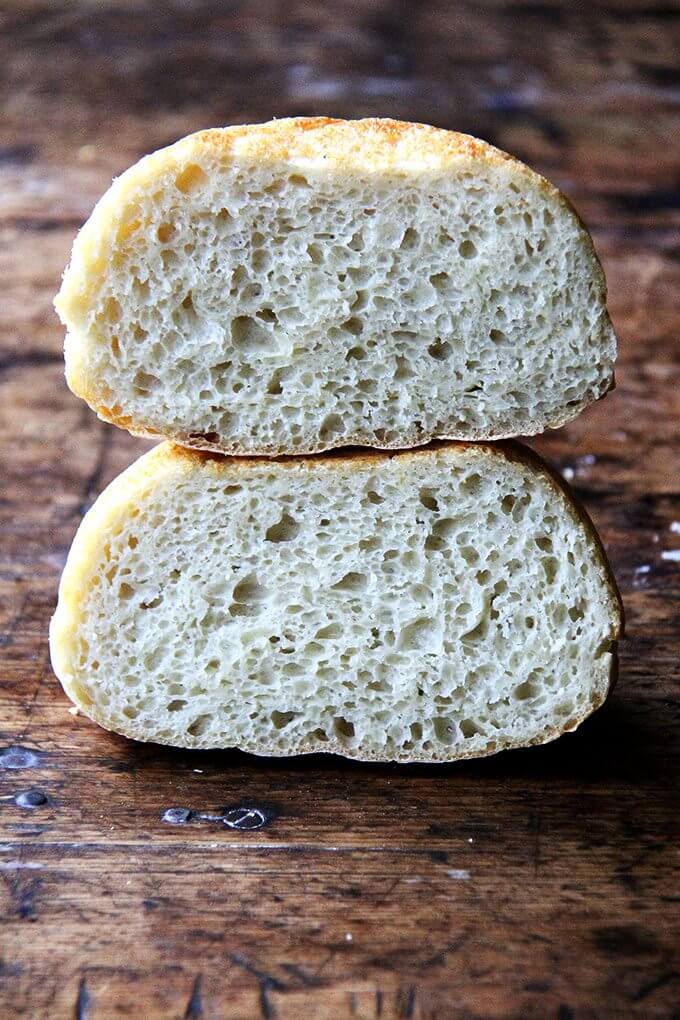
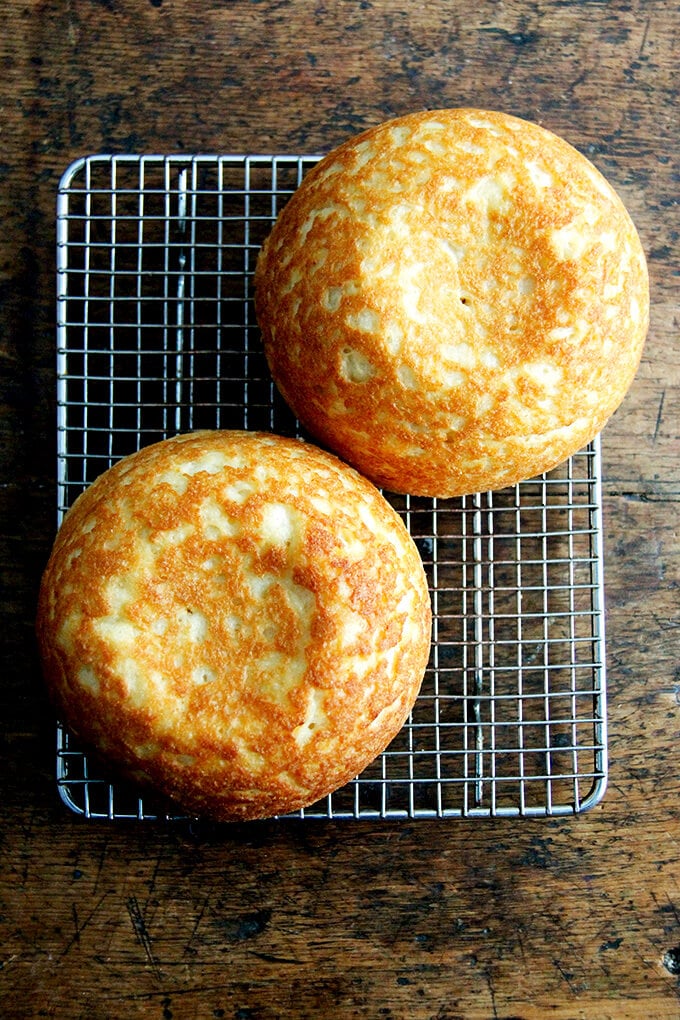
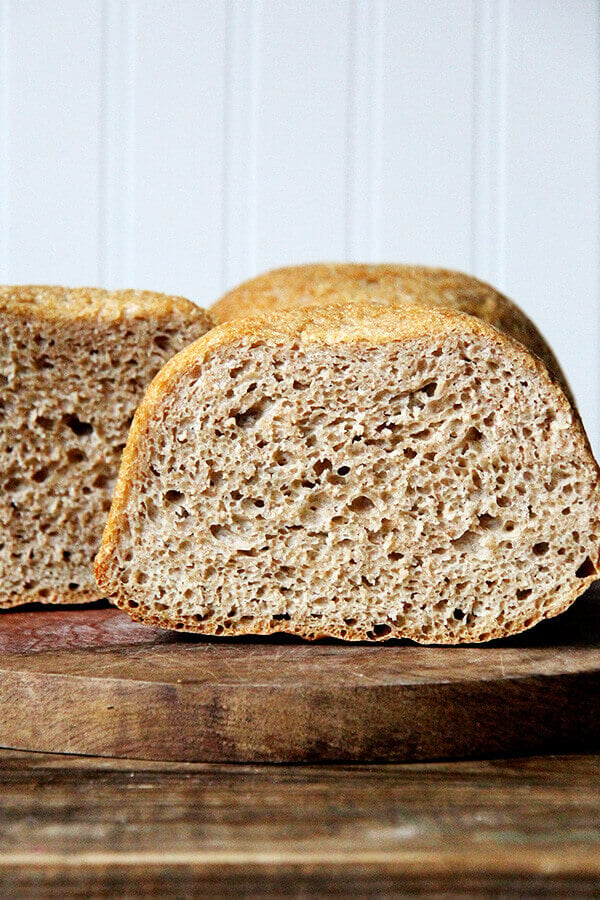
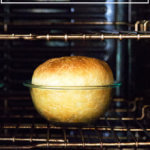
This is the no-knead bread recipe my mother has been baking for 45 years. Start to finish, it can be ready in three hours. It bakes in well-buttered Pyrex bowls — no need to preheat a baking vessel for this recipe — and it emerges golden and crisp with a soft, tender crumb. 🍞🍞🍞🍞🍞
When I tell you that, if forced, I had to pick one and only one recipe to share with you that this — my mother’s peasant bread — would be it, I am serious. I would almost in fact be OK ending the blog after this very post, retiring altogether from the wonderful world of food blogging, resting assured that you all had this knowledge at hand. This bread might just change your life.
The reason I say this is simple. I whole-heartedly believe that if you know how to make bread you can throw one hell of a dinner party. And the reason for this is because people go insane over homemade bread. Not once have I served this bread to company without being asked, “Did you really make this?” And questioned: “You mean with a bread machine?” But always praised: “Is there anything more special than homemade bread?”
And upon tasting homemade bread, people act as if you’re some sort of culinary magician. I would even go so far as to say that with homemade bread on the table along with a few nice cheeses and a really good salad, the main course almost becomes superfluous. If you nail it, fantastic. If you don’t, you have more than enough treats to keep people happy all night long.
The Magic of the Peasant Bread
So what, you probably are wondering, makes this bread so special when there are so many wonderful bread recipes out there? Again, the answer is simple. For one, it’s a no-knead bread. I know, I know. There are two wildly popular no-knead bread recipes out there.
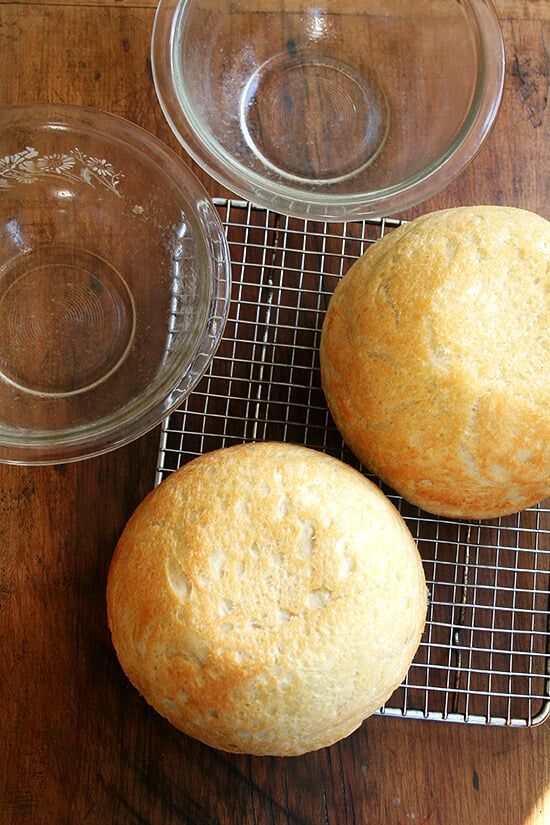
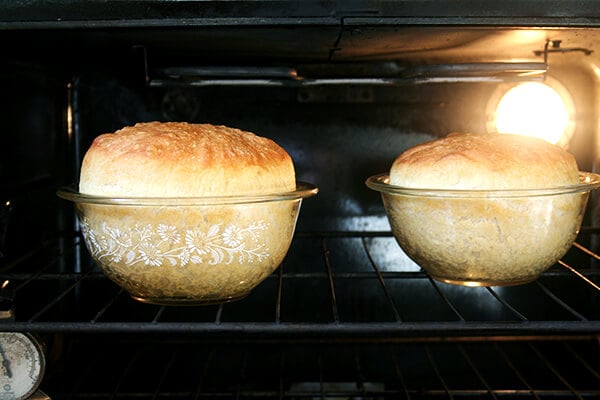
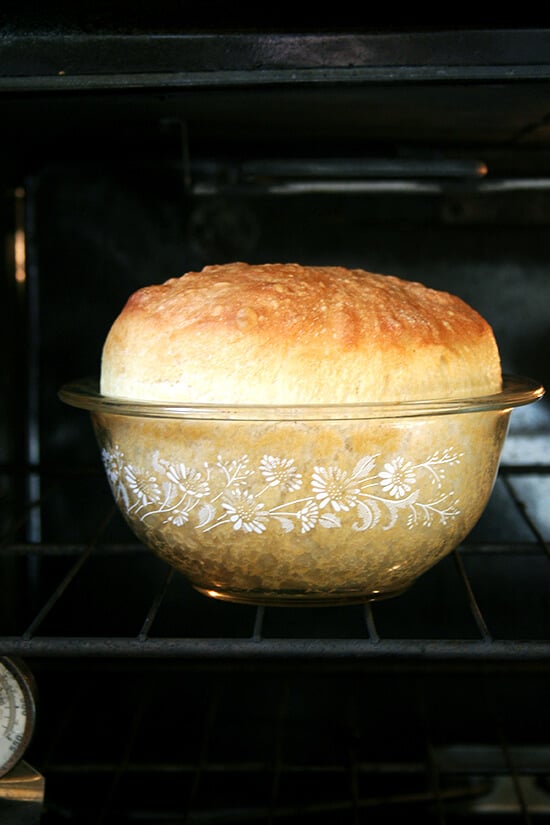
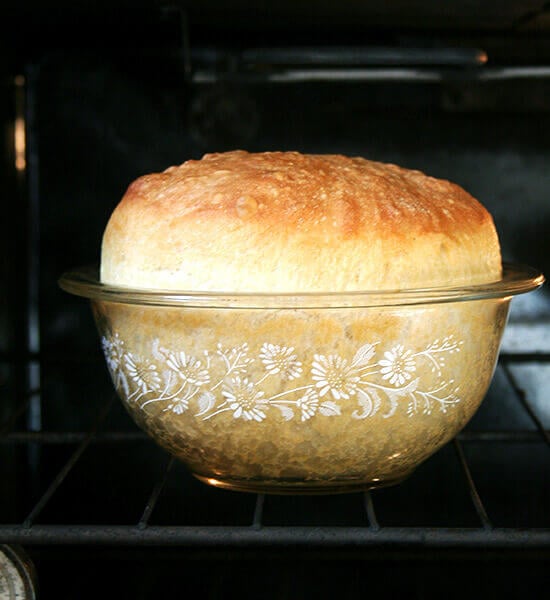
But unlike the others, this is a no-knead bread that can be started at 4:00pm and turned out onto the dinner table at 7:00pm. It bakes in well-buttered Pyrex bowls — there is no pre-heating of the baking vessels in this recipe — and it emerges golden and crisp without any steam pans or water spritzes. This is not artisan bread, nor is it trying to be. It is peasant bread, spongy and moist with a most-delectable buttery crust.
Genuinely, I would be proud to serve this bread at a dinner party attended by Jim Lahey, Mark Bittman, Peter Reinhart, Chad Robertson, Jeff Hertzberg and Zoe Francois. It is a bread I hope you will all give a go, too, and then proudly serve at your next dinner party to guests who might ask where you’ve stashed away your bread machine. And when this happens, I hope you will all just smile and say, “Don’t be silly. This is just a simple peasant bread. Easy as pie. I’ll show you how to make it some day.”
Peasant Bread Variations
Once you master the peasant bread, you can make any bread your heart desires — this simple no-knead bread recipe is the foundation of many of the other bread recipes on this site, namely this hugely popular overnight refrigerator focaccia and this simple homemade pizza dough. It’s even the inspiration behind this sourdough focaccia and this sourdough sandwich bread and this simple pita bread recipe.
The below post is organized as follows:
- How to Make Peasant Bread, Step by Step
- The Best Way to Store Bread
- Peasant Bread Dinner Rolls
- Peasant Bread Sandwich Bread
- How to Add Seeds and Nuts to Bread Dough
- How to Make Gluten-Free Peasant Bread
- How to Coat the Loaves in Seeds
- How to use Whole Wheat Flour
- How to Bake the Peasant Bread in a Dutch Oven
Many more variations on the peasant bread can be found in my cookbook, Bread Toast Crumbs:
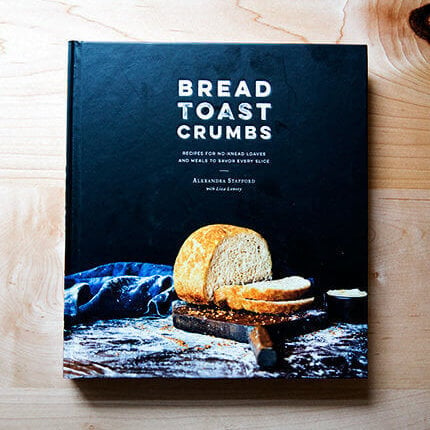
Bread Toast Crumbs
Love the peasant bread? There’s now a book filled with 40 simple bread recipes plus 70 recipes to use up every crumb of every loaf you bake.
How to Make Peasant Bread, Step by Step
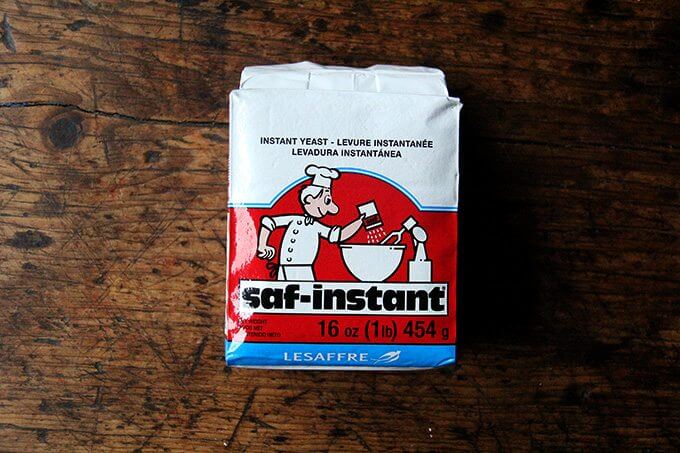
First: You need yeast.
This is the yeast I buy exclusively: SAF Instant Yeast. Instant yeast can be whisked into the flour directly without any blooming or proofing. If you want to stick to active-dry yeast, there are instructions in the recipe notes on how to do so. Red Star yeast is great.
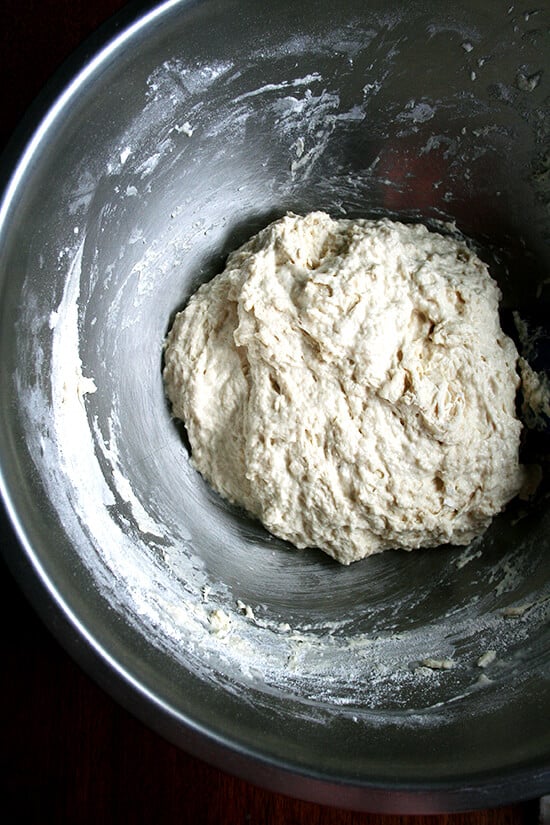
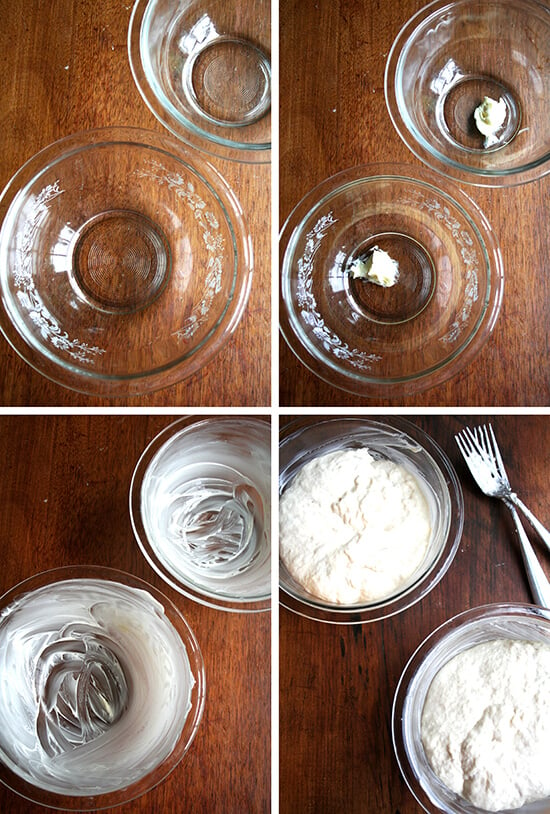
Whisk together flour, salt, sugar, and instant yeast. Add lukewarm water.
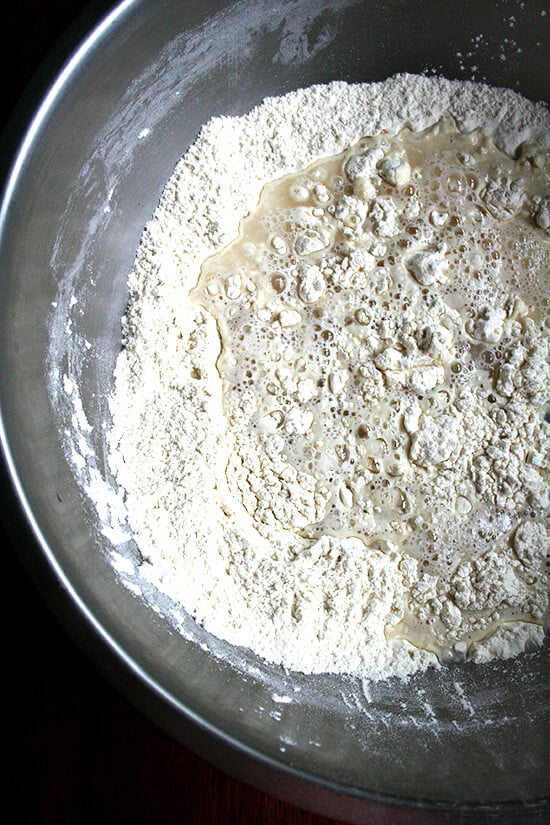
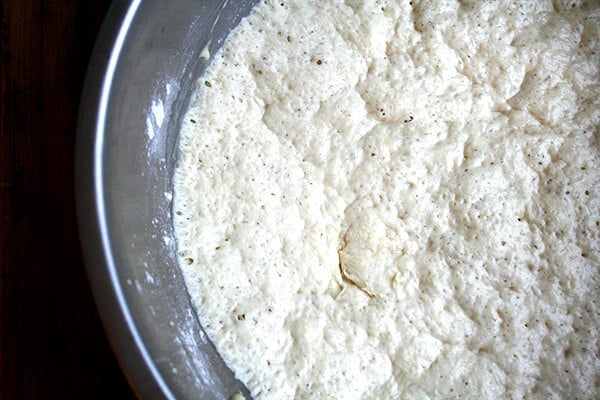
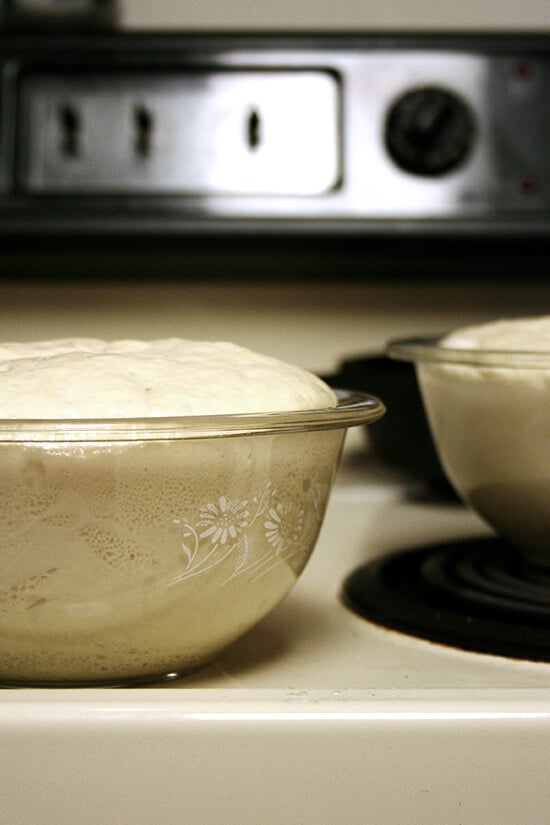
Mix until you have a sticky dough ball. Let it rise for 1.5 to 2 hours…
… or until it looks like this:
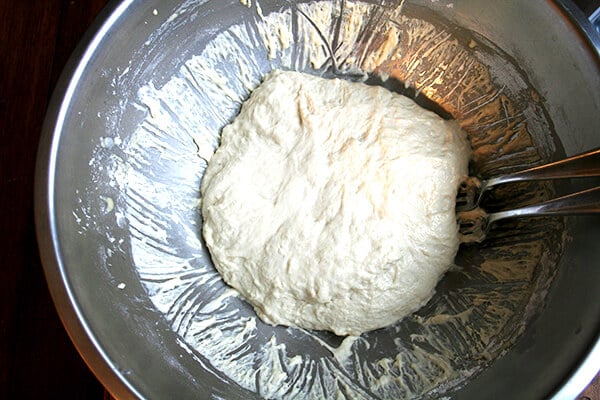
Punch down the dough using two forks.
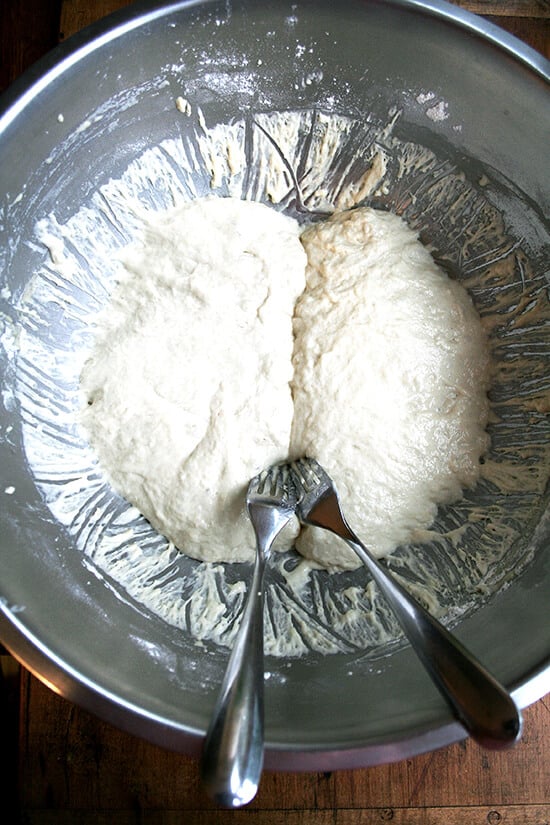
Then split the dough down the middle again using the two forks.
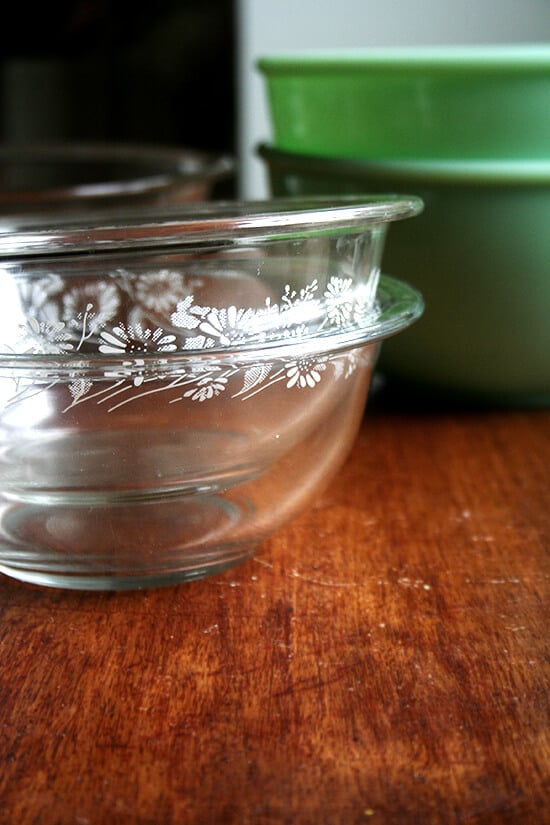
Because this is a very wet dough, it must be baked in an oven-proof bowl. I am partial to the Pyrex 1L 322 size, but any similarly sized oven-proof bowl will work.
Butter the bowls well; then transfer half of the dough to each prepared bow.
Let the dough rise again until it crowns the rim of the bowl, about 30 minutes.
Transfer the bowls to the oven to bake:
This bread is irresistible when it’s freshly baked, but it also makes wonderful toast on subsequent mornings as well as the best grilled cheese. It’s also my favorite bread to use for these egg salad sandwiches and for this no-tuna “tuna” salad.
The Best Way to Store Bread
If you want to store the bread at room temperature for 3 to 4 days, I think the best method is in a ziplock bag. I’ve tried other eco-friendly options, but nothing seems to keep bread freshest — the crumb the softest — better than a ziplock bag. You can re-use the bags again and again.
If you intend to keep the bread for longer, I would freeze it. I often slice bread as soon as it cools completely, transfer the slices to a ziplock bag, then freeze. This way, I know the bread was frozen at its freshest.
A ziplock bag will not prevent the crust of bread from turning soft, which is why I suggest always reheating day-old bread. I use a toaster at breakfast for slices of bread, and I reheat half or quarter loaves in the oven at 350ºF for 15 to 20 minutes when serving for dinner.
Bread revives so beautifully in the oven or toaster.
No-Knead Dinner Rolls
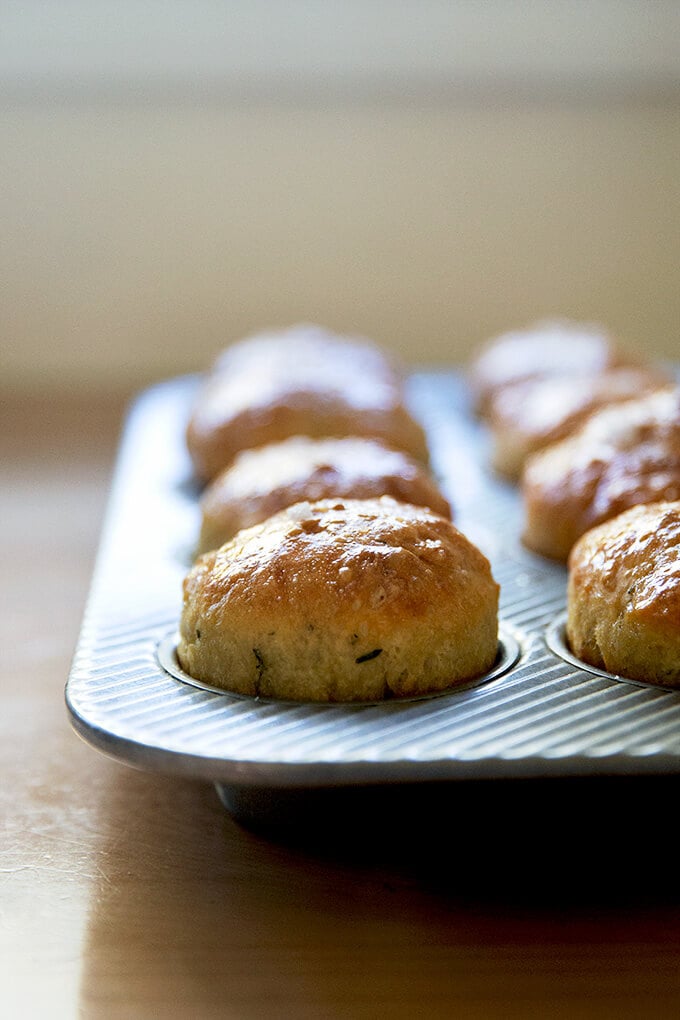
To use the peasant bread dough to make rolls, simply divide the dough into smaller portions and place in a buttered muffin tin as in these No-Knead Thyme Dinner Rolls (pictured above). This recipe for no-knead buttermilk pull-apart rolls is also based on the peasant bread as are these brioche pull-apart rolls.
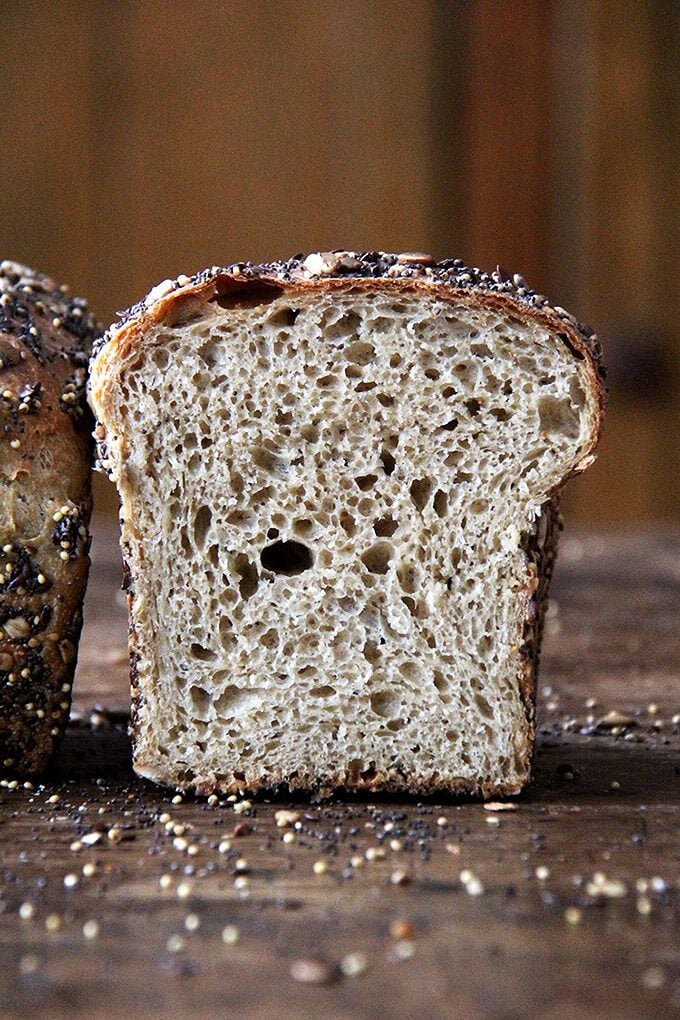
No-Knead Sandwich Bread
To make sandwich bread, multiply the recipe below by 1.5 and bake the bread in two buttered 8.5×4.5-inch loaf pans.
Made with half all-purpose flour and half King Arthur Sprouted Wheat Flour, these seed-coated sandwich loaves (pictured above) have a soft and light crumb. I really like KAF’s sprouted wheat flour, which is made from white whole wheat berries that, when sprouted, yield a creamy, sweet, milder-tasting flour. You can use 100% all-purpose or bread flour for an even lighter loaf or your favorite whole wheat flour in place of the sprouted wheat flour.
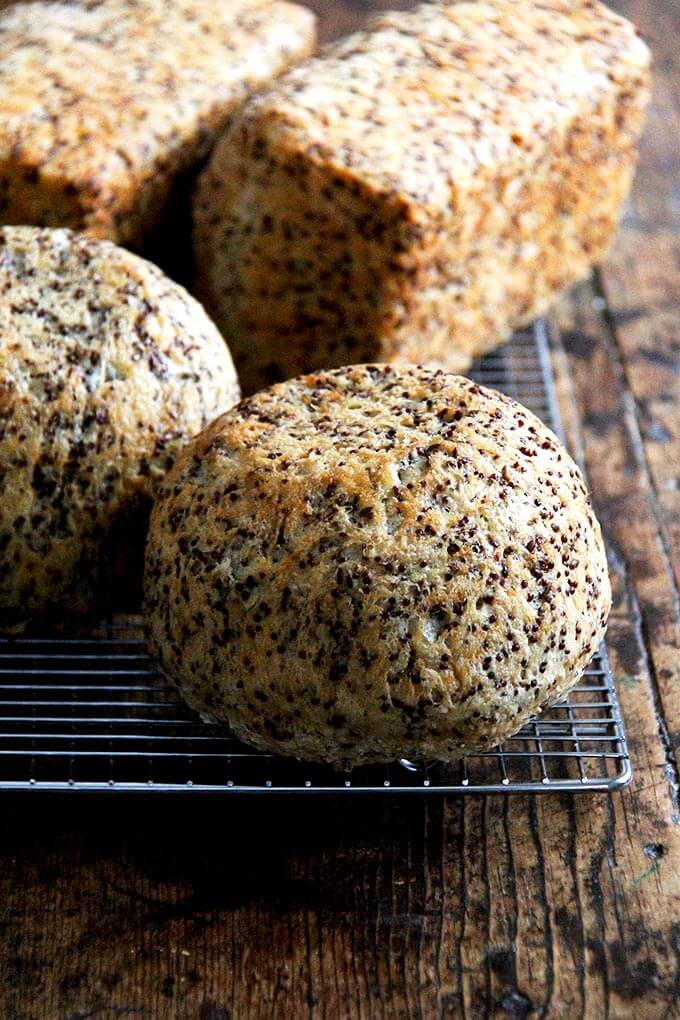
How to Add Nuts and Seeds to Bread Dough
To add seeds and nuts (or dried fruit and cheese), simply stir them into the dry ingredients. This recipe for Quinoa-and-Flax Toasting Bread will offer guidance on how much to add.
How to Make a Gluten-Free Peasant Bread
Making gluten-free peasant bread (pictured above) unfortunately isn’t as simple as swapping in gluten-free flour for the wheat flour. But the process and recipe is still super simple — in fact, because there’s only one rise, many people find the gluten-free peasant bread to be even simpler than the original. Find the recipe here: Gluten-Free Peasant Bread
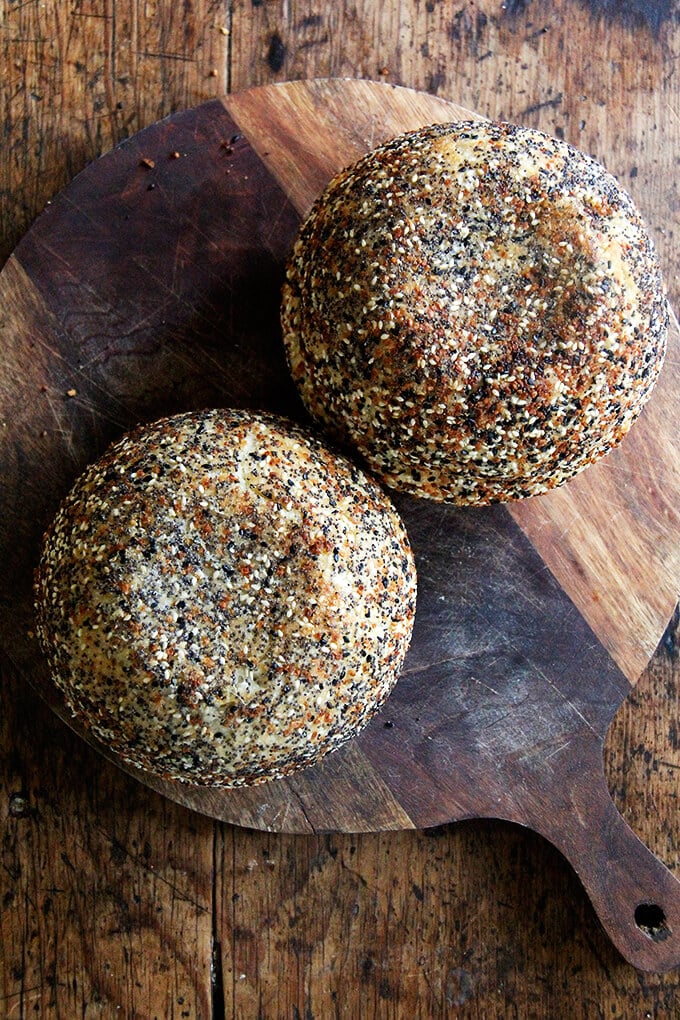
How to Coat the Loaves in Seeds
To coat the peasant bread in seeds, as pictured above, simply coat the bowls with everything bagel seasoning or with dukkah or sesame seeds or whatever seed mix you wish. The seed-coated loaves look so beautiful, and it’s amazing how much the flavor of the coating permeates the loaves. Find the recipe here: Everything Bagel Seasoning Peasant Bread
How to Use Whole Wheat Flour
To use whole wheat flour in the peasant bread, simply replace as much as 50% of the all-purpose flour with your favorite whole wheat flour: I like KAF’s sprouted wheat flour, and I’ve been loving the Cairnsprings Mill Trailblazer stone-milled flour. With the Trailblazer, I can use up to 75% of it in the peasant bread, and it yields a beautiful, chewy texture as well as a lovely flavor and aroma.
When using whole wheat flour, you may have to use more or less water — there is no rule as to how much more or less, and it will take some trial and error to get right because all flours absorb water differently. When I use KAF sprouted wheat flour, for example, I don’t change the water amount at all. When I use the Trailblazer flour, on the other hand, I reduce the water by at least 50 grams.
If you’d like to learn more about whole wheat flour and stone-milled flours, read this: Easy Sourdough Bread (Whole Wheat-ish)
How to Bake the Peasant Bread in a Dutch Oven
If you’re looking for more of a crackling crusted boule (characteristic of a loaf of sourdough bread) as opposed to the buttery crispness of the peasant bread, you can bake the peasant bread dough in a preheated Dutch oven.
There are detailed instructions below the recipe in the notes section, but one thing to keep in mind before you begin is dough hydration. The peasant bread is a very high hydration dough, meaning there is a lot of water relative to flour. Because baking the peasant bread in a Dutch oven will require some handling of the dough — to shape it into a round and to create some tension — you may want to reduce the water from the start. Consider holding back 20-30 grams of water to make the process more manageable for you.
My Mother’s Peasant Bread: The Best Easiest Bread You Will Ever Make
- Total Time: 2 hours 27 minutes
- Yield: 2 loaves
Description
Notes:
The bread:
This is a sticky, no-knead dough, so, some sort of baking vessel, such as pyrex bowls (you need two 1-qt bowls) or ramekins for mini loaves is required to bake this bread. See notes below the recipe for sources. You can use a bowl that is about 2 qt or 2 L in size to bake off the whole batch of dough (versus splitting the dough in half) but do not use this size for baking half of the dough — it is too big.

Peasant Bread Fans! There is now a book: Bread Toast Crumbs, a loaf-to-crumb bread baking book, filled with tips and tricks and answers to the many questions that have been asked over the years. In the book you will find 40 variations of the master peasant bread recipe + 70 recipes for using up the many loaves you will bake. Learn more about the book here or buy it here.
Ingredients
- 4 cups (512 g) unbleached all-purpose or bread flour
- 2 teaspoons (10 g) kosher salt
- 2 cups (454 g) lukewarm water (made by mixing 1.5 cups cold water with 0.5 cup boiling water)
- 2 teaspoons (8 g) sugar
- 2 teaspoons (8 g) instant yeast, I love SAF Instant Yeast, see notes below
- room temperature butter, about 2 tablespoons
Instructions
- Mixing the dough: In a large mixing bowl, whisk together the flour, salt, sugar, and instant yeast (I love SAF Instant Yeast). Add the water. Mix until the flour is absorbed. (If you are using active dry yeast, see notes below.)
- Let it rise. Cover bowl with a tea towel or plastic wrap and set aside in a warm spot to rise for at least an hour. (In the winter or if you are letting the bread rise in a cool place, it might take as long as two hours to rise.) This is how to create a slightly warm spot for your bread to rise in: Turn the oven on at any temperature (350ºF or so) for one minute, then turn it off. Note: Do not allow the oven to get up to 300ºF, for example, and then heat at that setting for 1 minute — this will be too hot. Just let the oven preheat for a total of 1 minute — it likely won’t get above 100ºF. The goal is to just create a slightly warm environment for the bread.
- Preheat the oven to 425ºF. Grease two 1-qt or 1.5-qt oven-safe bowls (see notes below) with about a tablespoon of butter each. Using two forks, punch down your dough, scraping it from the sides of the bowl, which it will be clinging to. As you scrape it down try to pull the dough toward the center (see video below for guidance). You want to loosen the dough entirely from the sides of the bowl, and you want to make sure you’ve punched it down. Then, take your two forks and divide the dough into two equal portions — eye the center of the mass of dough, and starting from the center and working out, pull the dough apart with the two forks. Then scoop up each half and place into your prepared bowls. This part can be a little messy — the dough is very wet and will slip all over the place. Using small forks or forks with short tines makes this easier — my small salad forks work best; my dinner forks make it harder. It’s best to scoop it up fast and plop it in the bowl in one fell swoop. Some people like to use flexible, plastic dough scrapers for this step.
- Let the dough rise again for about 20 to 30 minutes on the countertop near the oven (or near a warm spot) or until it has risen to just below or above (depending on what size bowl you are using) the top of the bowls. (Note: Do not do the warm-oven trick for the second rise, and do not cover your bowls for the second rise. Simply set your bowls on top of your oven, so that they are in a warm spot. Twenty minutes in this spot usually is enough for my loaves.)
- Bake it. Bake for 15 minutes. Reduce the heat to 375º and bake for 15 to 17 minutes longer. Remove from the oven and turn the loaves onto cooling racks. If you’ve greased the bowls well, the loaves should fall right out onto the cooling racks. If the loaves look a little pale and soft when you’ve turned them out onto your cooling racks, place the loaves into the oven (outside of their bowls) and let them bake for about 5 minutes longer. Remove from oven and let cool for 10 minutes before cutting.
Notes
- The bowls: The cheapest, most widely available 1-qt bowl is the Pyrex 322. Update: These bowls are becoming harder to find and more expensive. As a result, I’m suggesting this cheaper option: the Pyrex 3-piece set. You can split the dough in half as always (see recipe) and bake half in the 1-quart bowl and half in the 1.5 quart bowl. The loaves will not be the same shape, but they will be delicious nonetheless.
- Yeast: I buy SAF Instant Yeast in bulk from Amazon I store it in my fridge or freezer, and it lasts forever. If you are using the packets of yeast (the kind that come in the 3-fold packets), just go ahead and use a whole packet — It’s 2.25 teaspoons. I have made the bread with active dry, rapid rise, and instant yeast, and all varieties work. The beauty of instant yeast is that there is no need to “proof” it — you can add the yeast directly to the flour. I never use active-dry yeast anymore.
- If you have active-dry yeast on hand and want to use it, here’s how: In a small mixing bowl, dissolve the sugar into the water. Sprinkle the yeast over top. There is no need to stir it up. Let it stand for about 10 to 15 minutes or until the mixture is foamy and/or bubbling just a bit — this step will ensure that the yeast is active. Meanwhile, in a large bowl, whisk together the flour and salt. When the yeast-water-sugar mixture is foamy, stir it up, and add it to the flour bowl. Mix until the flour is absorbed.
- Troubleshooting: You can find step-by-step video instruction here.
- Several commenters have had trouble with the second rise, and this seems to be caused by the shape of the bowl they are letting the dough rise in the second time around. Two hours for the second rise is too long. If you don’t have a 1-qt bowl, bake 3/4 of the dough in a loaf pan and bake the rest off in muffin tins or a popover pan. The second rise should take no more than 30 minutes.
- Also, you can use as many as 3 cups of whole wheat flour, but the texture changes considerably. I suggest trying with all all-purpose or bread flour to start and once you get the hang of it, start trying various combinations of whole wheat flour and/or other flours.
- The single most important step you can take to make this bread truly foolproof is to invest in a digital scale. This one costs under $10. If you are not measuring by weight, do this: scoop flour into the measuring cup using a separate spoon or measuring cup; level off with a knife. The flour should be below the rim of the measuring cup.
- Here’s a printable version of this recipes that’s less wordy: Peasant Bread Recipe, Simplified
- How to Bake the Peasant Bread in a Dutch Oven: Preheat a Dutch Oven for 45 minutes at 450ºF. Dust a clean work surface with flour. After the first rise, turn the dough out onto the floured surface and shape it into a ball: I like to fold it envelope style from top to bottom, then side to side; then I flip it over and use the pinkie edges of my hands to pinch the dough underneath and create some tension. Transfer the dough to a sheet of parchment paper. Let rest for 20 minutes. If you feel your dough is spreading too much you can lift up the sheet of parchment paper, dough and all, and place it in a bowl of a similar size. After the 20 minutes, transfer the dough, parchment paper and all to the Dutch oven. Carefully cover it. Bake 30 minutes. Uncover. Bake 15 minutes more.
- To bake the peasant bread in a loaf pan: If you are using an 8.5×4.5-inch loaf pan or a 9×5-inch loaf pan, you can bake 3/4 of the dough in it; bake off the rest of the dough in ramekins or other small vessels … the mini loaves are so cute. You can also make 1.5x the recipe, and bake the bread in 2 loaf pans. If you have a large loaf pan, such as a 10×6-inch loaf pan, you can bake off the entire batch of dough in it. For loaf pans, bake at 375ºF for 45 minutes.
- How to Bake at Hight Altitude:
- First try the original recipe as written (preferably with a scale). You may not need to make any adjustments. One commenter, who lives at 9200 ft finds the original recipe to work just fine as is.
- If the original recipe doesn’t work, try adding a little bit more water because it rises fast and it is so dry: about a quarter cup for every 512 g of flour.
- Try decreasing the yeast to 1.5 teaspoons.
- If your dough is especially gooey, try decreasing the water by 1/4 cup. But, if you aren’t using a scale, my first suggestion would be to buy a scale and weigh the flour, and make the bread once as directed with the 2 cups water and 512 grams flour, etc.
- Punch the dough down twice before transferring it to the buttered Pyrex bowls. In other words, let it rise for 1-1.5 hours, punch it down, let it rise again for about an hour, punch it down, then transfer it to the buttered bowls.
- Variations:
- #1. Cornmeal. Substitute 1 cup of the flour with 1 cup of cornmeal. Proceed with the recipe as directed.
- #2. Faux focaccia. Instead of spreading butter in two Pyrex bowls in preparation for baking, butter one 9×9-inch glass baking dish and one Pyrex bowl or just butter one large 9×13-inch Pyrex baking dish. If using two vessels, divide the dough in half and place each half in prepared baking pan. If using only one large baking dish, place all of the dough in the dish. Drizzle dough with 1 tablespoon of olive oil (if using the small square pan) and 2 tablespoons of olive oil (if using the large one). Using your fingers, gently spread the dough out so that it fits the shape of the pan. Use your fingers to create dimples in the surface of the dough. Sprinkle surface with chopped rosemary and sea salt. Let rise for 20 to 30 minutes. Bake for 15 minutes at 425ºF and 17 minutes (or longer) at 375ºF. Remove from pan and let cool on cooling rack.
- #3. Thyme Dinner Rolls
- #4 Gluten-free
- #5. Everything Bagel Seasoning Bread. Simply coat the buttered bowls with Everything Bagel Seasoning. Watch a how-to on Instagram Stories here.
- #6: Whole Wheat Peasant Bread. Use as much as 50% whole wheat flour. I like King Arthur Flour’s white whole wheat flour (see this post) or sprouted wheat flour (see this post).
- Prep Time: 5 minutes
- Cook Time: 32 minutes
- Category: Bread
- Method: Baked
- Cuisine: American
This post may contain affiliate links. Please read my disclosure policy.


6,421 Comments on “My Mother’s Peasant Bread: The Best Easiest Bread You Will Ever Make”
I love LOVE this Recipe. If I want to bake it as 1 loaf how long would I bake it for?
Hi Kimberly, sorry for the delay here! I would do 15 minutes at 425, then 25 minutes at 375. Give it a tap after that, and if it needs more time, keep checking after 5 minutes. You can also turn the bowl out and let the bread bake right on the oven rack or on a sheet pan for 5 minutes or so to crisp up the crust.
I make this in two glass pyrex loaf pans rather than bowls – turns out perfect and makes for easy sandwich bread!
So happy to hear this Erin! I love this for sandwich bread, too. It sounds as though it’s working as is just fine for you, but if you ever find your loaves to be a bit squat, you can do 1.5 times the recipe.
I LOVE that your kids were wanting to help and talking in the background, much more realistic for how cooking goes as a mom. Love your laughing too… I’ll have to try this recipe if for no other reason than because I loved the reality of it, thanks for being real!!!!
Thank you, Naomi, that means a lot 🙂 🙂 🙂 These rascals are never far from my feet 🙂
I bought your book and really love it. Had an issue. I made the rye bread recipe. I mixed the dough (it was really wet) & let it sit out for 2 hours to rise which it did;I then put it in the refrigerator for about 8 hours. I then put the dough into a clay baker which is the long one (like for french bread) & let it rise for about an hour .it rose slightly higher than the ridge of the baker. I covered it with the clay cover and placed in a cold oven as the clay baker instructions states to do & baked for 50 minutes at 475 and then removed the cover for about 5 minutes. The bread is yummy tasting BUT it sunk in the middle. Too much liquid? Did I let it rise too much? Perhaps the clay baker is not correct for this type of bread.Should I have let it rise in the refrigerator instead of the 2 hours sitting out? Just put it straight into the refrigerator Any thoughts? Thanks!
Hi Leslie, thanks for buying the book! It sounds as though the dough is a little wet and perhaps it did rise for a little too long. This is what I would do next time: either stick the dough in the fridge right after you mix it (so, don’t let it rise at room temp for 2 hours) or if you do let it rise for 2 hours at room temperature, punch it down (as in, deflate it with the forks) then stick it in the fridge for 8 hours.
Your second rise sounds about right especially if the dough had been refrigerated—I find it takes an hour, too, with refrigerated dough. This makes me think that there probably was too much liquid. Do you use a scale for the flour?
Also, what size is your clay baker? It’s so great you’re using it! I have a romertopf that I’ve been dying to try. Did you soak it? And did you grease it with butter?
Hi there, I tried this recipe last week and loved it. Went back to try it again and added chia and flax seeds. I let the dough rise for one hour, but now it is very dry. I may have gone too crazy with the seeds? I put in about one cup of seeds. Is there any way to fix my dough? Add water?
Hi Greta! Sorry for the delay here … how did it turn out? I typically use 3/4 cup of seeds (sorry! did you watch the video during which I say 1 cup of seeds? I misspoke. In the book, I advise starting with 1/2 cup.) In terms of fixing the dough, it’s really hard to fix it at this stage in the process. If you have a stand mixer with a dough hook, that might be a good way to incorporate water, or it will take some strong kneading on a board or in a bowl. Next time, try 1/2 cup chia (or quinoa) and 1/4 cup flax. I’ve never actually used chia, though I know people have with success, but I’m also wondering if the chia absorbs the liquid more than other seeds, which is why your dough might be dry?
When baking with flax seeds soak them in water to soften them it really helps a lot
Made this bread for the first time today. The directions were easy to follow and understand and it came out beautifully. I made a wonderful dinner for my mother and wife for Mother’s Day and this bread was the crowning achievement. Will be buying a copy of the book and can’t wait to try out your other recipes!
Jeremy, this is so sweet. I’m so happy to hear this. Thanks so much for writing in!! It means so much.
Made this bread today, it was a success!!!!! Thank you for sharing. I did add 2 tbsp of each-Sesame seed, chia seed, flax meal and 4tbsp of oat bran.
Wonderful to hear this!
This has become my go to bread and the kids love helping. …my 4 year old son calls it his crunchy bread thanks for the receipt it is a great bread with minimal effort!!!
So happy to hear this, Susan! Love when the kids can help 🙂
How well would this recipe work as dinner rolls if I were to drop them into a muffin tin?
Very well! Check out this post: https://alexandracooks.com/2013/11/26/thyme-dinner-rolls/
Hey There,
What size ramekins would you recommend for the SAF yeast recipe?
Thank you, kindly,
Jules
Hi Jules,
Can you clarify? Do you mean for extra dough? Are you baking off some of the dough in a larger vessel and looking for a vessel for the remainder of the dough? I have 4-oz ramekins that I bake off dough in to make mini loaves.
Thank you, kindly for your quick reply! I would be using the muffin pan…and I see that the 4-oz ramekin works perfectly. Thanks so much for your time. Can’t wait for the UPS guy to bring your recipe book!
Have a wonderful week end,
Jules
Perfect, Jules, so happy to hear this!! Thank you for ordering the book, too—means the world!
I have a vegan in the family. Can you grease the bowls with olive oil or other vegetable oil or spray it with Pam? He won’t eat it otherwise. Thanks ahead of time for your help. Your instructions and videos are great.
Hi Celia, I would suggest Earth Balance, softened vegan buttery sticks, or coconut oil. Gena, vegan blogger extraordinaire, made the peasant bread with vegan buttery sticks: http://www.thefullhelping.com/six-tasty-vegan-toast-ideas/ She suggests: Softened vegan buttery sticks or solid coconut oil
Hi Alexandra,
Made my first loaf of bread last night to accompany dinner and it was a TREMENDOUS success (thank you!). It overcame all the objections I had for making bread and is truly magical for all the reasons mentioned above. Most of all everyone at the table felt special being in the presence of freshly baked homemade bread (and they were!). I’ve been dreaming all night about how I can improve upon / modify it next time. And so, if it isn’t asking to much, I’d like to ask you a few questions. Feel free to be short with your answers as I’m sure you receive many inquiries!
Questions:
(1) If I am using SAF instant yeast (vs. Red Star Active Dry Yeast) does the water temp matter? If so can you advise what the desired temperature range is (note: on my first attempt w/ Red Star I tried mixing 1/2 cup boiling water with 1 1/2 cups cold water but it did not result in “lukewarm” water and much lower than the stated temperature range of 110-115F on the package)
(2) With regards to the first rise, if I wait 2 hours (instead of 1) will it yield a better final result in the quality of the bread? Is there a risk of waiting too long?
(3) I currently own two loaf pans, each 1-1/4 pounds that measure 9 x 5 x 2.75 inches. Would it be possible to successfully make the bread in these pans? If so can you advise how to adjust ingredients, times, baking temperatures etc.?
(4) Is possible to shape this bread into a challah or is it too sticky to shape?
(5) Is it possible to successfully make this bread using whole wheat flour (either a blend or pure of King Arthur Flour’s sprouted wheat flour)? If so can you advise how to adjust ingredients, times, baking temperatures etc.?
P.S. I just ordered your book from the link on your website and can’t wait (also plan on gifting it to friends who recently move into a new place along with freshly baked loaves)!
Thank you from San Francisco 🙂
Steven
Steven, hi! I’m so happy to hear all of this, and thank you for ordering my book — means a lot. And I’m always happy to answer questions. Here you go!
1) If I am using SAF instant yeast (vs. Red Star Active Dry Yeast) does the water temp matter? If so can you advise what the desired temperature range is (note: on my first attempt w/ Red Star I tried mixing 1/2 cup boiling water with 1 1/2 cups cold water but it did not result in “lukewarm” water and much lower than the stated temperature range of 110-115F on the package) I honestly don’t know what the ideal temperature range should be — it probably should be what is stated on the package. Because I find thermometers to be so unreliable, I do the 1/2 cup boiling to 1 1/2 cups cold water, and that tends to be perfectly lukewarm. This is what I advise people to do, too, because I think people worry when they work with yeast, so this little trick tends to be assuring. The water probably could be a little bit warmer without risking killing the yeast. If SAF gives a range on the package, and if you have a reliable thermometer, I would give it a shot.
(2) With regards to the first rise, if I wait 2 hours (instead of 1) will it yield a better final result in the quality of the bread? Is there a risk of waiting too long? 2 hours is great, and it definitely can go longer. There is a point where it does go too far, but this is after 4-6 hours — you know if it’s gone too far if it falls on its own. It’s subtle, but the dough, instead of being poofy, will be dipping down — hope this makes sense. I almost always let the dough rise longer than stated in the instructions because I often whisk it up first thing in the morning, stick it in the oven (warm spot to rise), then go do errands or whatever else I need to be doing, and get around to punching it down around lunch time.
(3) I currently own two loaf pans, each 1-1/4 pounds that measure 9 x 5 x 2.75 inches. Would it be possible to successfully make the bread in these pans? If so can you advise how to adjust ingredients, times, baking temperatures etc.? Yes! For loaf pans, I generally advise making 1.5 times the peasant bread recipe, so 6 cups flour, 3 cups water, 3 teaspoons (1 tablespoon) salt, 3 teaspoons sugar, and 2.5 teaspoons yeast. I also like to add a little bit of oil: 1/3 cup. This Seedy Sandwich bread post has a recipe for 2 loaf pans: Seedy Sandwich Bread
(4) Is possible to shape this bread into a challah or is it too sticky to shape? I find it a little tricky to shape — I had hoped to include a challah or babka recipe in my book, but I had a hard time creating a recipe that I felt would be a good user experience for people. (But, I do have a brioche recipe in the book as well as a few other recipes that call for handling the dough (monkey bread, cinnamon swirl bread, pull-apart rolls), so it can be done!) My friend Holly taught me how to make challah, and I love her recipe: Holly’s Challah
(5) Is it possible to successfully make this bread using whole wheat flour (either a blend or pure of King Arthur Flour’s sprouted wheat flour)? If so can you advise how to adjust ingredients, times, baking temperatures etc.? Yes! I love KAF sprouted wheat flour, and I like using a mix of half ap-flour and half sprouted wheat, so 2 cups (256 g) ap, 2 cups (256 g) sprouted wheat. Keep all other ingredients the same. I wrote about KA sprouted wheat flour in this post: Seedy Sandwich Bread
Question: Are you using a scale to weigh?
Let me know if there is anything else!
Omg how could I have not posted a comment for this yet!! Well, it’s late but I must say, I loved this recipe, well, love this recipe so much! I look like a rockstar when I bring it out to the table and it’s delicious every single time. Thanks so much for sharing. I’m so grateful that you did because it also gave me the perfect opportunity to film a recipe review for it on my channel to keep sharing the bread love! Amazing.
Britt, I loved your video so, so much, and I’m so happy to see hear from you here. So glad you like bread. Thanks so much for writing in. xo
Can you use other flours? White spelt? Rye? Oatmeal? Buckwheat?
Yes! I suggest substituting 50% of the all-purpose with 50% of your wheat flour of choice (spelt, whole wheat, etc.). With rye, I would just do 1 cup rye, 3 cups all-purpose. Oatmeal and Buckwheat are tricky because they are gluten-free, so that will take some experimenting. I have recipes for rye bread, oatmeal maple bread and 38 others in my cookbook, Bread Toast Crumbs, as well as advice on how to substitute flours. Good luck!
Just found the recipe. Sounds wonderful. Two questions: Can you freeze the dough and Can you make cinnamon roll out of the dough?
Looking forward to making it.
Can i add green olives or black olives? When do I do that?
Well, here goes my blood glucose! This is wonderful bread. I made it in two loaf pans and it came out great. Thank you so much for the recipe.
I was always afraid of yeast doughs until this one came along! I recently made with 2 cups ap flour and 2 cups bread flour in a 2 lb loaf pan and it turned out wonderful!
Wish I could attach a picture!
Made the bread last night in my pyrex loaf pans and it came out beautifully! So tasty! I want to try it in the bowls now – just have to get them. The videos are very helpful! I look forward to experimenting now.
Hi Alexandra,
I am eagerly waiting to try this beautiful bread but i don’t have this pyrex bowl which i don’t think is available in uk in stores ( i can find it online but then its quite expensive online.
Can you please any alternate tins or bowls in which i can bake to get this beautiful shape? also the quantity which will go inside or other things that i need to take in consideration while using alternate cooking bowl
I just made this for the first time and it’s delicious! It was just slightly gummy on the inside with a inch and a half or so hole in the middle, definitely cooked but a little chewy – is there a bread Baker’s tip for avoiding that or is it kind of meant to have that texture? The crust and everything was perfect!
Hi Amanda! Sorry for the delay here. The hole in the middle makes me think something is off a little bit. The texture of the bread is definitely moist, soft, spongy, but it should be cooked all the way through and not gummy. Questions: did you make any adjustments to the recipe? What size bowls were you using? Do you measure with a scale?
Thanks for your reply! I didn’t make any adjustments – I just chalked it up to first time breadmaking. I used the 322 bowls you suggested. Only thing weird i noticed was when I was separating the dough after punch down, my forks couldn’t hold the dough to lift it, like they went right through – i had to grab it with my hands. I used a scale but it’s pretty cheap so i wonder if it just wasn’t accurate enough and there wasn’t enough flour? It still tasted really good, but had more of the consistency of a crumpet if you know what I mean.
Hi Amanda!
Sorry for the delay here. It does sound as though the flour is a little off, but I use a cheap scale as well, and it works fine. You definitely should be able to hold the dough with your forks, and it makes sense that the consistency is more crumpet-like given the wetness of the dough. I think next time, I would still use the scale, but if the dough is still too wet — you should be able to tell as soon as it is mixed — add more flour a quarter cup at a time. Look at the video for reference for the dough consistency. Good luck!
Thanks so much! I will try that today!
Are all your recipes set for convection bake? When I purchased my new Miele oven the man at the store said all recipes now (since 2000) are made for “convection oven” cooking. I am asking because my oven has another setting which is not convection. I just purchased your book on Amazon.
Hi Kathy,
Thanks so much for writing! I actually never use convection, though my oven does have a convection setting. Thank you for buying Bread Toast Crumbs! I would first try the recipes using your standard setting, then experiment with convection, turning the temp down 25ºF. Good luck!
I’ve made this recipe a few times and love it! The one issue I have had though is it comes out a bit spongier then what I see in your pictures, and feels like there might be too much moisture in the bread. I’ve experimented a bit and have followed the instructions perfectly… Any thoughts on what could be causing this? Thanks!!
I thought at first the dough wasn’t rising enough, but the last time I made it, the rises looked perfect and I still had this issue. Doesn’t make it taste any less delicious, but I feel like it could be tweaked… just don’t know how! 🙂
So sorry for the delay here! If the dough is coming out spongy, you are right — there’s probably too much moisture. Are you using a scale to measure? If not, I might consider reducing the water by a quarter cup or so — look at the videos for reference for what the texture of the dough should look like. Let me know if you have any other questions!
I bought a Pyrex 322 & 325 at a local Peddlers Mall for $5. Would the 325 work ok for the 2 loaves of bread with the 322? Can’t wait to try. Thanks.
HI Jayne,
Sorry for the delay here! How big is the 325? 4L? Any size will work as long as you grease the bowls well. The shape may turn out a little differently, but what’s nice is that you have one 322, which will work perfectly in that it will turn out like the photos here.
Great finds!
Could I cut the loaf horizontally to make picnic style pressed sandwiches?
Good question! I love this idea. I’m wondering however, if the bread is too tall for this? If you baked the bread in two shallower Pyrex bowls, something like this one, it might work. Or even a square baking dish like a 9×9-inch pan.
This recipe is fantastic. Have been making this bread for several years now and my family always loves it. Would love to find a long mold that I could use to make faux baguettes. Wouldn’t that be great?
That would be amazing! I have seen something on the King Arthur Flour site: http://www.kingarthurflour.com/shop/items/baguette-baker-red
Expensive, but maybe promising?
I turn just the light on in my oven to make a comfy warm place to let dough rise. Works well. The incandescent bulb gives off just the right amount of heat to keep it warm for the yeast to grow. BTW, I found baguette pan + a baton pan at a thrift store for just two dollars. You might want to check out one near you.
Nice! Let me know how the baguette pan works. I’m definitely in the market!
Check out Ebay. We purchased Corning glass bread tubes with a wire rack. Comes with recipes. I make bread dough, roll it out and place pepperoni & cheese on it. Roll the dough up lengthwise and seal the edges. Bake in the glass tube. Everyone loves it.. Could serve with pizz sauce . Great for parties
Yum!
Just do a google search for “baguette pans” . Lots out there in all price ranges.
Eager to try this! I rarely buy unbleached flour! shameful! Should I attempt with what I have (bleached all purpose) or go purchase?
Sweetpea, I normally suggest just using what you have, but I do find I can taste the difference when I’ve used bleached flour. That said, the recipe will certainly work with bleached flour, so if you don’t feel like heading out, go for it!
Can you use sourdough starter? Would it need to have some added instant yeast? The bagette pans are available through King Arthur flour on line.
Looks really good!
You can! I need to do a post on this because people ask often. This is what I’ve done in the past:
50 g starter
2 cups (430 g) lukewarm water
2 tsp. kosher salt (10 g)
4 cups (512 g) all-purpose flour
no sugar
Mix as described in the recipe. If the first rise takes all day, you can deflate it, divide it, and place the portions in buttered pyrex bowls, and stick them in the fridge. In the morning, take them out, and let them rise for about 2 hours before baking them off.
You can also let the dough rise all night, and in the morning, deflate the dough, and divide it into bowls and let it rise for an hour or so before baking it off. The dough may not look as though it is doing much, but in the oven it will puff up.
Hope this helps! I really like the bread. It’s not super sour tasting, which I like, but it has some nice subtle sour notes.
I can’t believe you can use those bowls at such a high temperature in the oven???? Won’t they break???
I’ve been doing it for about 20 years, and my mom has been doing it for about 40, and we’ve never broken a single bowl. Fear not! Happy Baking!
Not all bowls are oven safe, but pyrex is. Make sure your using oven safe bowls.
This sounds so yummy & so much better than a bread machine loaf. One question — are there any adjustments I would need to make due to high altitude? I live in the Denver, CO area and making things like bread from scratch or even cooking baked beans creates a lot of frustration. Any suggestions?